
Sure, the skull is biodegradable. But didn’t you know that large-scale human farming is responsible for the vast majority of CO2 emissions?!
- 1 Post
- 30 Comments
Joined 1 year ago
Cake day: July 2nd, 2023
You are not logged in. If you use a Fediverse account that is able to follow users, you can follow this user.
This seems to be a bug in the slicer. I’m seeing the same issue in OrcaSlicer if the skirt height is set to more than one layer (even if the skirt is disabled). This makes sense if a skirt is used (can’t print a continuous spiral if you have to switch between printing the object and the skirt), but not if it’s disabled.
What slicer are you using? If it’s a PrusaSlicer fork, this is likely the same bug.

 3·2 months ago
From a cursory read of the datasheet, using the “dead time control” pin seems to be the way to go. Basically, this pin is used to set the voltage, while the error amplifier inputs (that’s the closest function to “over current protection” this chip has) are used to adjust the output according to the load. For your application, you probably don’t need to use them at all.

My instinct would be to disable the error amplifiers by connecting pins 1,2,15 and 16 to GND. You can then connect the wiper pin of the potentiometer to the deadtime control input, with the other pins of the potentiometer connected to GND and 3.3 V.
I haven’t worked with this chip before, so take this with a grain of salt. You should probably use a simulation tool to check the circuit before you start destroying chips.
Do you expect every meme to be meticulously handcrafted? It’s a stupid joke, not a work of art.

Close, but the word ends in -le, not -ie. The -le suffix is used as a diminutive form in some German dialects.
If that freehub is constructed like the ones I’ve taken apart before, you’re out of luck. Like you suspected, the teeth lock the rotation of the freehub to the hub, unless the screw in the back is taken out first.
You can try hammering in a (slightly larger) torx key or using an easy-out (probably won’t work if it’s very tight).
As a last resort, you could try to drill out the screw (only so far that the freehub comes off, you don’t want to drill into the hub). Then you should hopefully be left with enough left of screw to grab with a pipe wrench.

My router is called Jupiter, everything connected to it is named after a moon. Callisto, Ganymede, Thelxinoe, Kallichore are what I’m currently using.

 17·5 months ago
IIRC, this is actually done at some point in the books.
You can host a Firefox sync server yourself. You could run that on something like a Raspberry Pi in your local network. If you need remote access, use something like cloudflare tunnels (although I guess that’s something else to be paranoid about).

 341·6 months ago
Windows is clearly superior. If you’ve had enough of the settings app, you can just switch to the control center!
Reminds me of this: Falsehoods Programmers Believe About Names

 1·8 months ago
Tightening the belts seems to have helped, but I will have to do some more printing to be sure. Thanks for your help!
The belts are parallel to the axis, but I will try tightening them some more.
This is a 40x40 cube printed in vase mode:
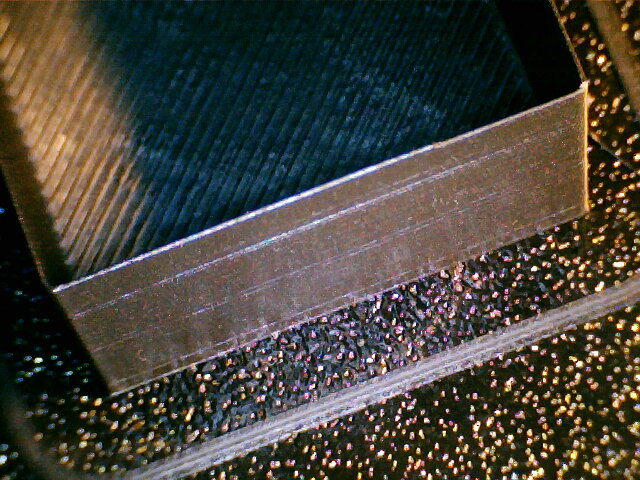
The corners look pretty okay on that:
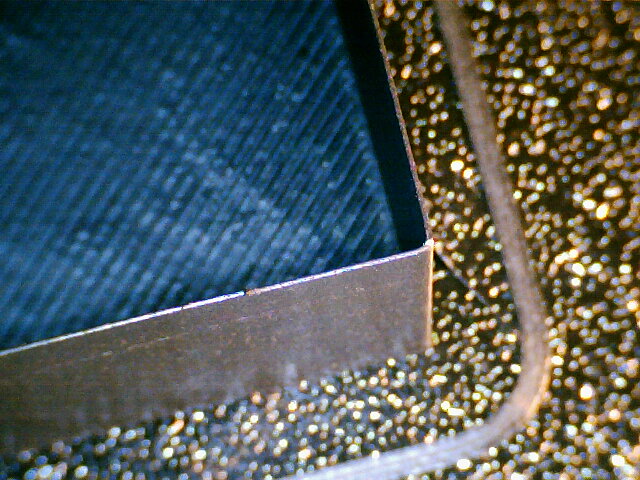
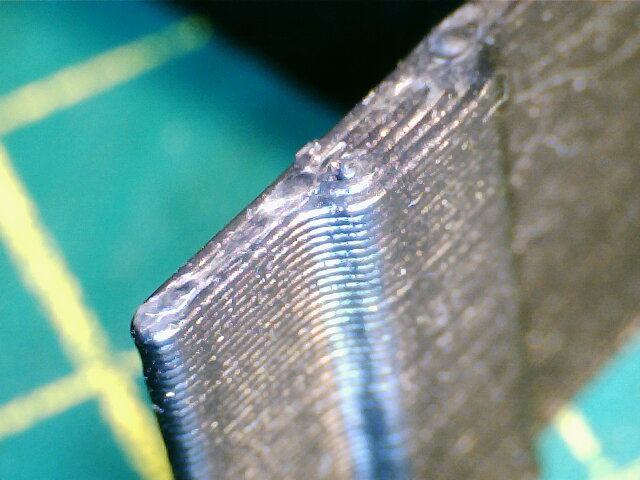
But I don’t see these kind of results on real-world parts. I guess I have to print some more test parts to narrow down the problem.
That might be part of it, my filament is probably pretty wet. I’ll try some other rolls of filament.
The part is just pretty small, I have the EW set to 0.45 mm withe 0.4 nozzle. But I will try turning it down further.
The rounding looks much more extreme than what I would expect or have seen on other printers I worked with (mostly Ultimakers).
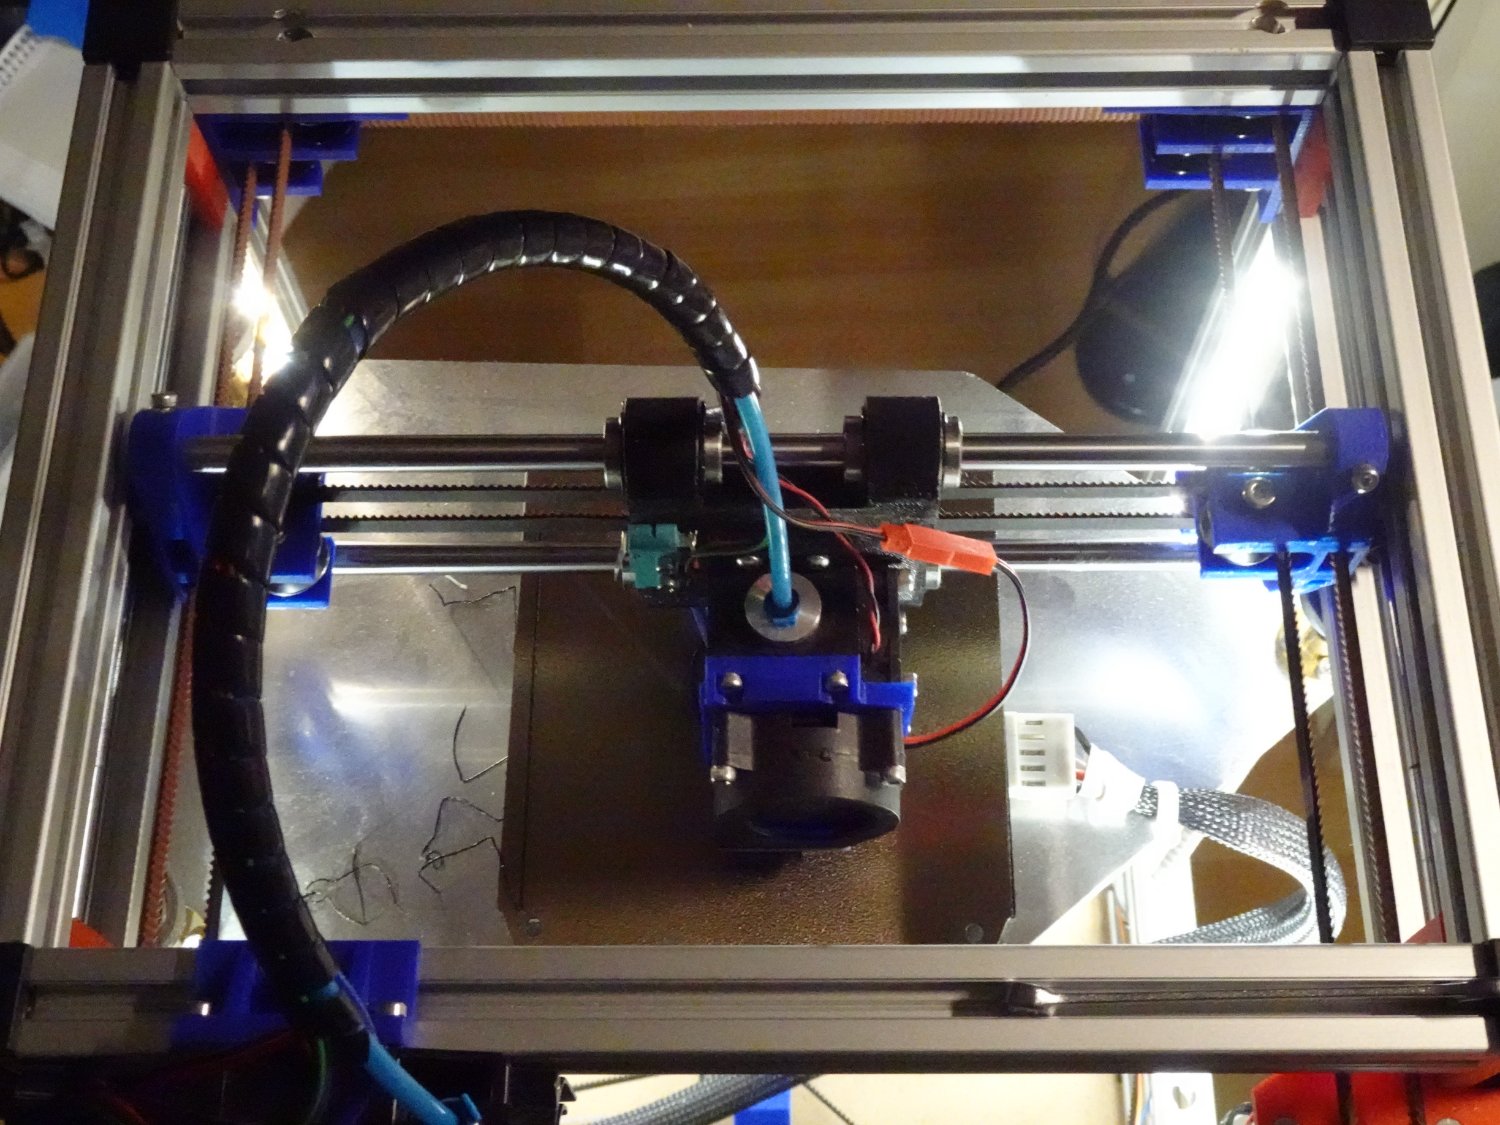
It’s a printer of my own design running marlin. I’m going to try disabling input shaping, but if I remember correctly the problem was already there before I ever enabled it.
Good point, see my edit
 4·9 months ago
I’m guessing it’s about documenting the assembly of safety-critical components. If some part of, let’s say an airplane fails because a bolt comes loose, the manufacturer wants to have a paper trail attached to it to prove that this specific bolt was indeed torqued to the correct spec. Connecting the wrench to the network could make this documentation much easier.
You can use a boost converter to boost the 5V of an USB port to the 19V your notebook needs.
Assuming 5A output from a powerbank (which is probably about the max you will get without USB PD), you could theoretically get 0.55A at 19V. With the unavoidable inefficiencies, you will get less.
So, maybe enough to very slowly charge your notebook while it’s off. But when it’s turned on, the battery charge will still drop.